Flat-Pack Firepit
A small bolt-together firepit made from one steel sheet, one length of angle iron, and ordinary 1/4-20 hardware. It breaks down flat and only needs straight cuts, drilled holes, real deburring, and gloves.
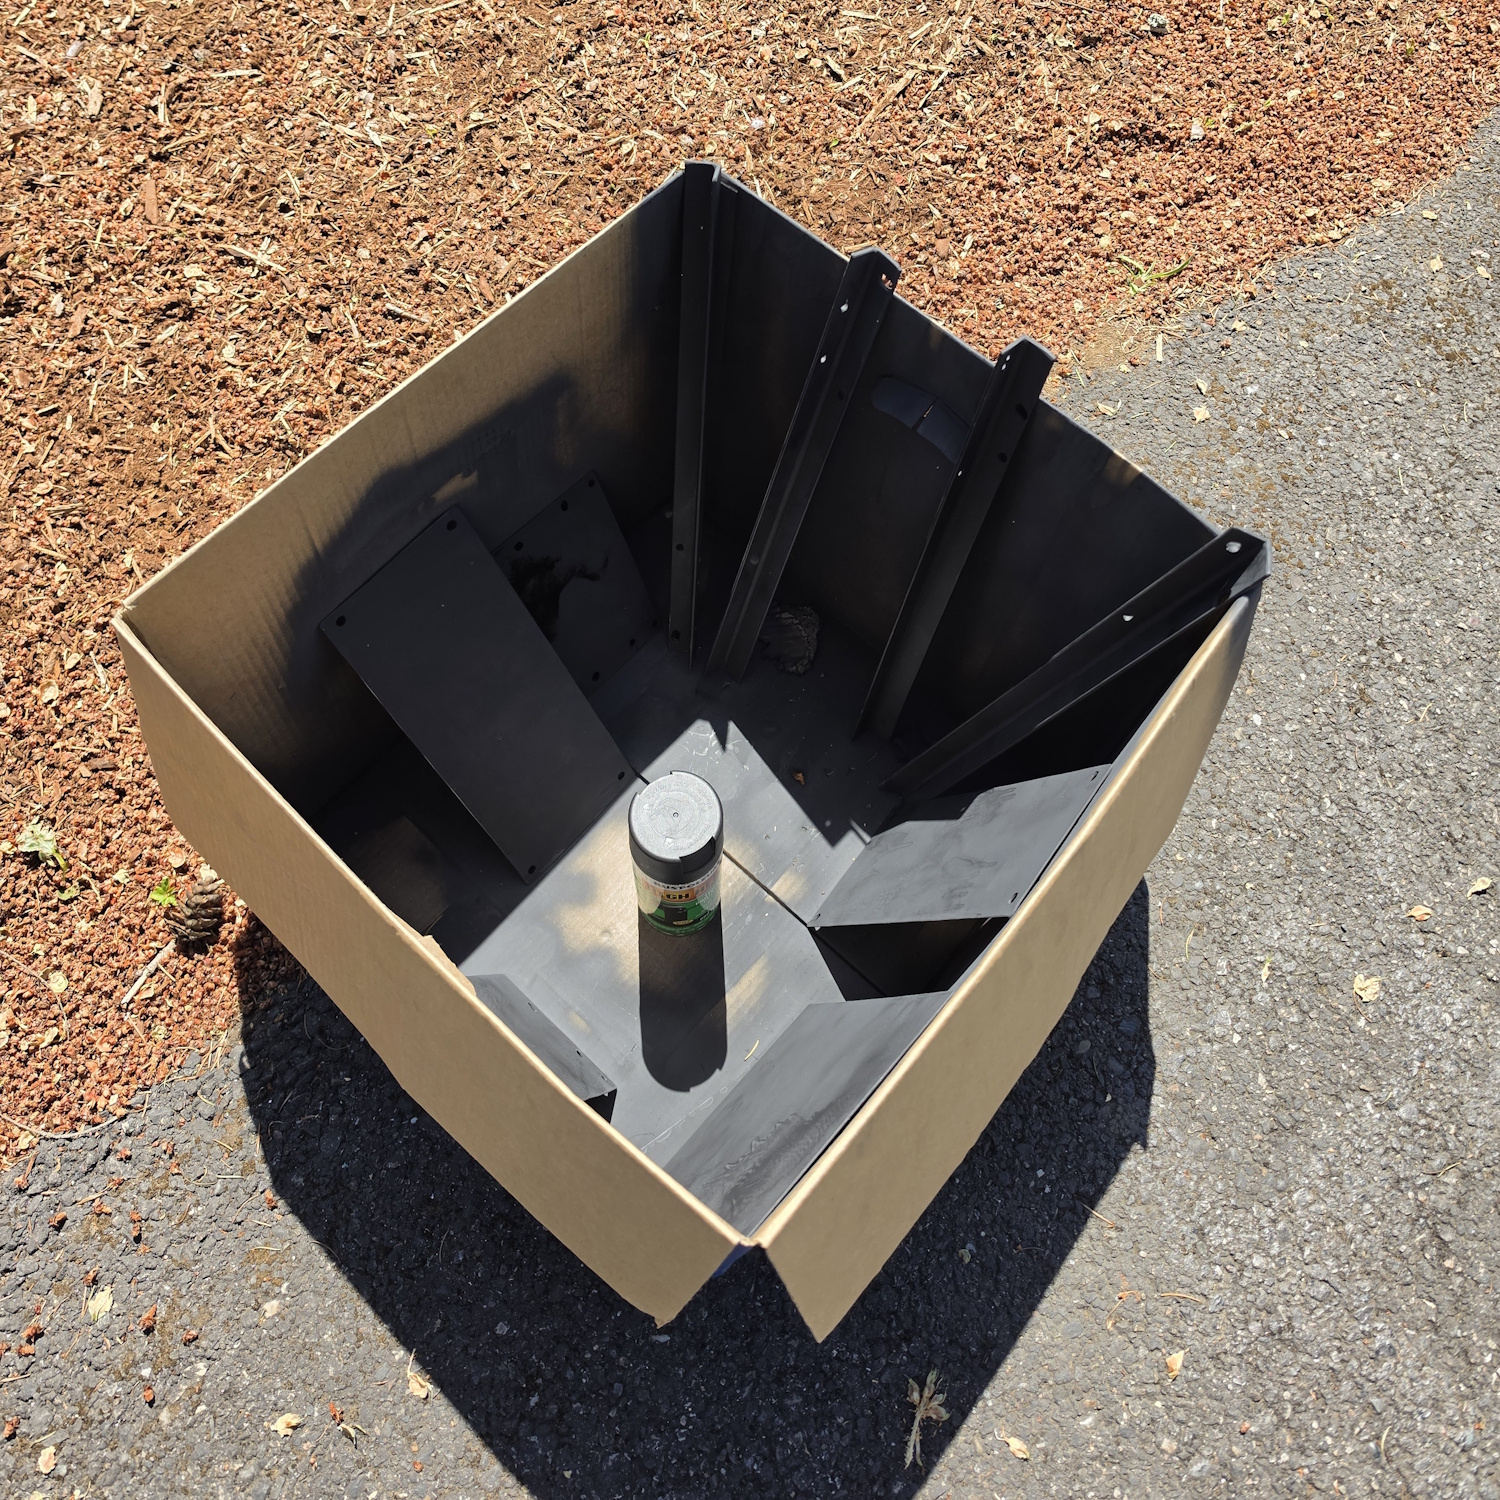
The build is deliberately plain: four 16″ angle-iron posts act as both corners and legs. Four wall panels bolt to those posts. The end-wall holes are offset 1/2″ lower than the long-wall holes so the corner bolts do not run into each other. The 12″ x 7″ base drops in last and sits on the lower long-wall bolt heads.
Wear gloves. Not thin winter gloves, not “I will just be careful” bare hands: real work gloves. Fresh-cut sheet steel is much sharper than it looks, and the drilled holes leave small burrs that are happy to catch skin.
I learned this the dumb way. I sliced my hand open by not wearing gloves, and three stitches later I was back at it, a little slower and a lot more respectful of the edges. The project is easy; the metal is not soft.
All five flat parts come from the 12″ x 24″ sheet: one 12″ x 7″ base, two 12″ x 5″ long walls, and two 7″ x 5″ end walls. Mark the full layout before cutting; the only waste is a 2″ x 7″ strip.
- Mark every line with a ruler and permanent marker before cutting.
- Cut the 12″ x 24″ sheet in half so you have two 12″ x 12″ squares.
- From the first square, cut 7″ from one edge. The 12″ x 7″ piece is the base; the remaining 12″ x 5″ piece is one long wall.
- From the second square, cut 5″ from one edge. That 12″ x 5″ piece is the second long wall.
- Cut the remaining 12″ x 7″ piece at 5″ and 10″. The two 5″ x 7″ pieces are the end walls.
- Save the leftover 2″ x 7″ strip as scrap or test material for drilling.
Cut four 16″ pieces from the angle iron. Each post gets two 1/4″ bolt holes in each flange, all measured from the top end. The long-wall flange uses holes at 1″ and 4″. The end-wall flange uses holes at 1-1/2″ and 4-1/2″, which keeps the perpendicular bolts from colliding in the corner. The lower 11″ becomes the leg.
- Mark one flange on each post as the long-wall flange. Mark hole centers 1″ and 4″ from the top end, centered 1/2″ in from the outer edge.
- Mark the other flange as the end-wall flange. Mark hole centers 1-1/2″ and 4-1/2″ from the top end, also centered 1/2″ in from the outer edge.
- Center punch the marks so the bit does not wander.
- Pilot drill with a 1/8″ bit, then open each hole to 1/4″.
- Keep the long-wall and end-wall flanges labeled until assembly; the offset only works if those patterns stay matched to the right panels.
- Repeat for the other three posts.
The long walls and end walls do not use the same vertical hole pattern. Long walls use holes 1″ and 4″ down from the top edge. End walls use holes 1-1/2″ and 4-1/2″ down from the top edge. That 1/2″ stagger is what keeps the 3/4″ bolts from trying to occupy the same corner. Put all wall-panel holes 1/2″ in from the side edges. The base panel does not get bolt holes.
The 12″ x 7″ base panel stays loose. Drill a simple vent pattern, smooth the burrs, and leave the edges clean enough to handle without slicing up your hands.
Do this before paint and before final assembly. File every cut edge on the wall panels, base, and angle-iron posts until the corners stop feeling like little knives. Knock the corners down slightly too; they do not need to be rounded over perfectly, just safe to handle.
- Run a flat file along both faces of every cut edge to remove the raised lip left by cutting.
- File the corners of each sheet-metal panel so they are no longer needle-sharp.
- Clean the inside of every drilled hole. Use a round file, deburring tool, countersink, or a larger drill bit turned gently by hand.
- Check the work with a gloved finger. If the glove catches, keep filing.
Assemble the box on its side first. Gravity will hold the posts and wall panel in alignment while you push the bolts through. Bolt heads face inward. Wing nuts go outside.
- Lay one long wall outside-face down on the bench.
- Set two corner posts on the ends, with the long-wall flanges lined up to the long-wall holes.
- Push four 3/4″ 1/4-20 hex bolts through the wall and post holes from the inside. Start the wing nuts on the outside, but leave them loose.
- Repeat with the other long wall and the remaining two posts. You now have two flat wall-and-post assemblies.
- Stand those two assemblies parallel, about 7″ apart.
- Bolt one end wall to the open ends using the lower, offset hole pattern, then turn the box around and bolt on the other end wall.
- Square the box, tighten the wing nuts by hand, then drop the base in from the top. It should land on the lower long-wall bolt heads.
Let the firepit cool fully before touching the hardware. Pull the base first, spin off the wing nuts, slide the bolts out, and separate the panels from the posts. The panels stack flat; the posts bundle together; the bolts and wing nuts should live in a small bag.
After the sharp edges and holes are cleaned up, wipe the metal down and spray on two light coats of high-temp stove paint. I am not trying to keep a camp firepit pristine; the paint just makes it look finished and keeps the mess under control.
Do the first burn outdoors because the paint will smoke while it cures. Set the firepit on non-combustible ground, keep it away from dry brush and decking, and use gloves when handling hardware after a burn.